22 Brown to Blonde Balayage Ideas
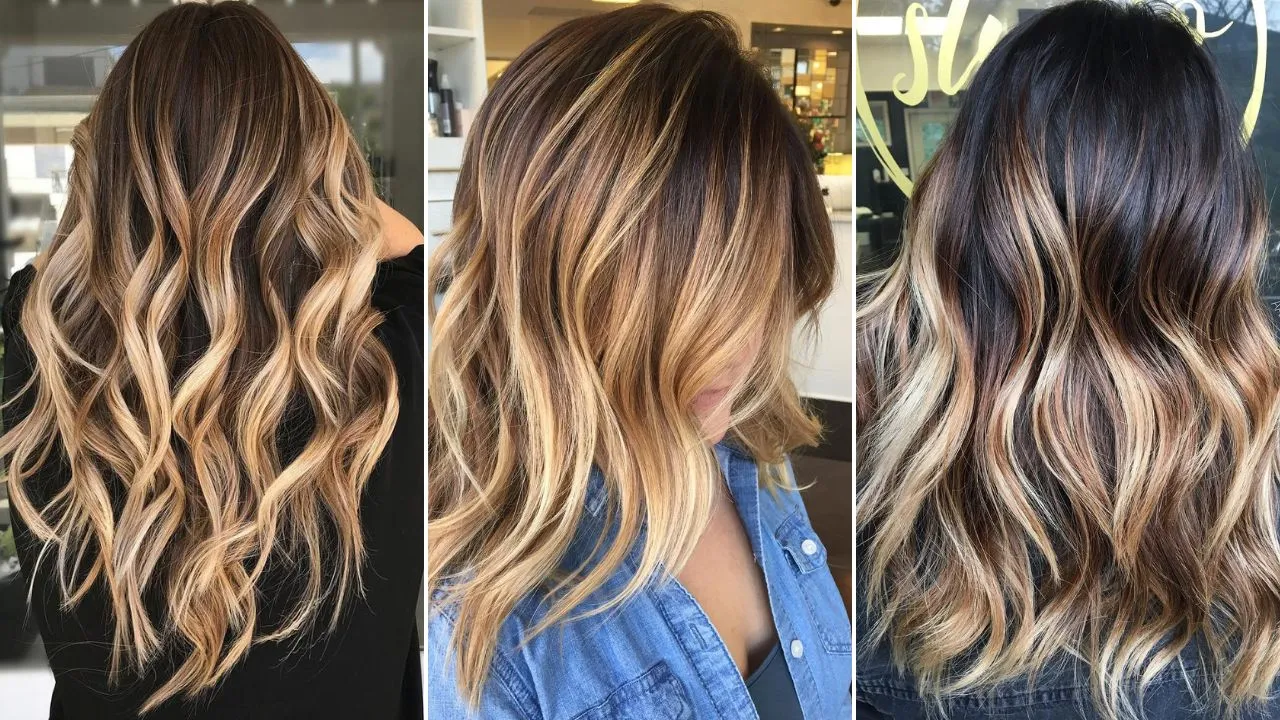
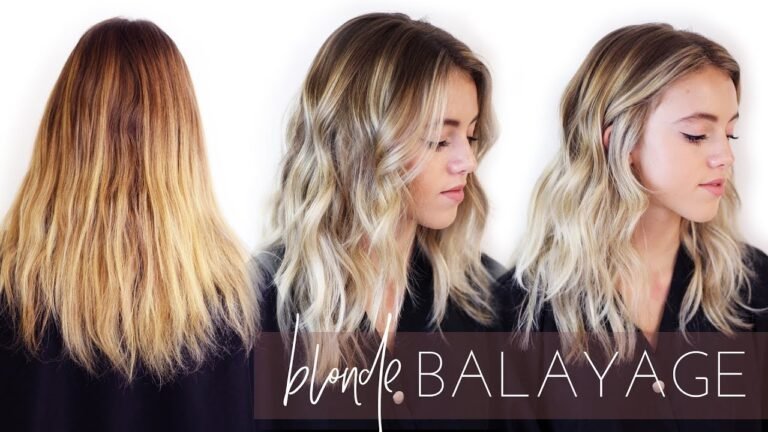
There’s a reason brown-to-blonde balayage never goes out of style. It works with your natural base instead of fighting it, grows out without looking neglected, and gives you that sun-warmed, effortlessly lightened look that full bleach jobs often try too hard to replicate.
The one conversation worth having before you sit in the chair: be honest with your stylist about your hair history. Previous colour, heat damage, and chemical treatments all affect how your hair lifts and what shade of blonde is actually achievable in one session. That honesty upfront is what gets you the result you want instead of a compromise.
1. Warm Caramel Blonde Balayage
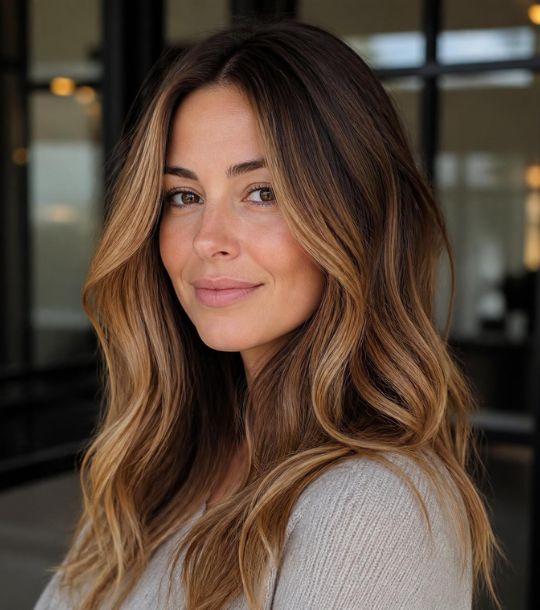
Warm caramel blonde is the most natural-looking entry point into brown-to-blonde balayage. The golden caramel tones sit close enough to a natural brunette base that the transition reads as something the sun did rather than something a colorist did. It’s the perfect first balayage for anyone nervous about going too light too fast.
Ask your colorist to keep the lightest pieces at the ends and through the face frame while leaving the mid-lengths at a mid-caramel tone. That graduation from brunette root to caramel mid-length to lighter caramel ends is what creates the genuine depth and dimension that makes this shade so consistently flattering.
2. Honey Blonde Balayage
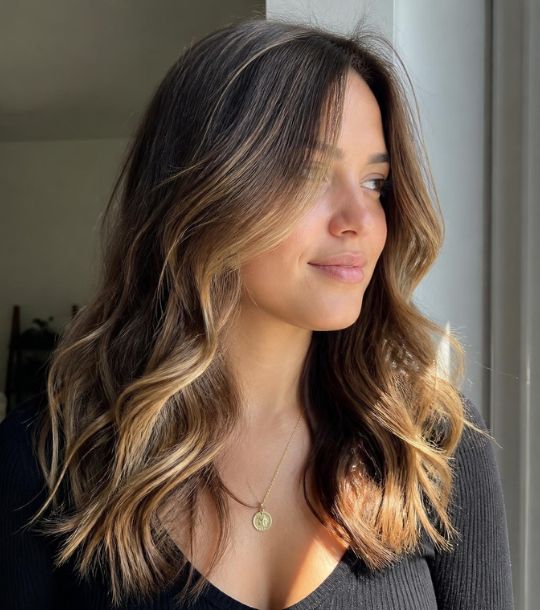
Honey blonde sits slightly lighter and warmer than caramel, with a golden richness that catches light beautifully in every season. On medium to dark brown bases, it creates a contrast that reads as luminous rather than dramatic. The warmth of the honey tone complements a wide range of skin tones, which is part of why it’s one of the most requested balayage shades globally.
Request honey and golden toners blended rather than a single toner at the end of the lightening process. A blended toner creates more dimension in the final colour than a single flat tone. Apply a bond-building treatment during the lightening process to protect fine or previously coloured hair from unnecessary damage.
3. Dark Brown to Ash Blonde
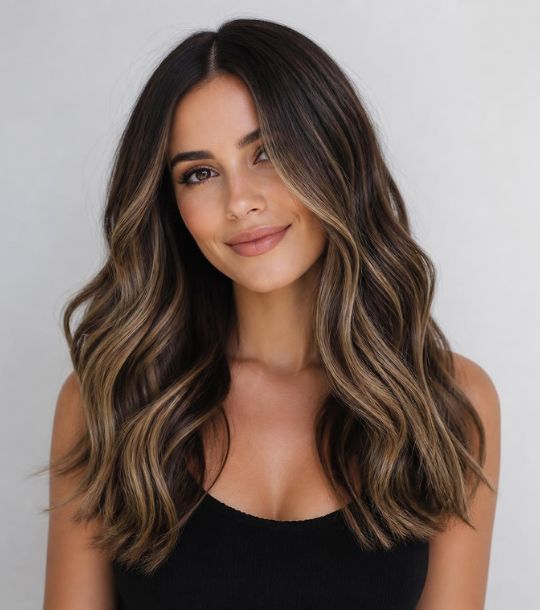
Going from dark brown to ash blonde is one of the more technically demanding brown to blonde transitions because it requires lifting the hair light enough to apply a cool ash tone without it pulling warm or brassy. When done correctly, the result is sophisticated, cool, and genuinely striking against deeper skin tones.
This almost always requires at least two sessions spaced several weeks apart. Rushing an ash result on dark brown hair typically leads to an uneven, patchy lift that takes a cool toner poorly. At the second session, your colorist can assess the lift and apply the ash blonde toner accurately across an even base.
4. Chocolate Brown to Butterscotch Blonde
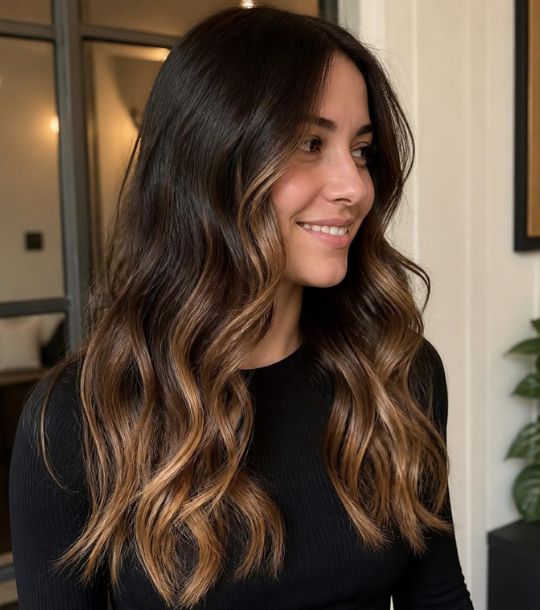
Chocolate brown melting into butterscotch blonde is a rich, warm, and deeply flattering combination. The two tones share enough warmth that the transition looks natural while still creating visible, beautiful contrast. It’s a particularly stunning combination in autumn and winter when warm hair tones feel especially relevant.
Tell your stylist you want butterscotch concentrated through the ends and lower mid-lengths with the chocolate base kept intact above the collarbone. Keeping the rich brunette at the top is what gives this look its depth. A gloss treatment in a golden butterscotch tone at each appointment maintains the warmth between full colour sessions.
5. Bronde Balayage
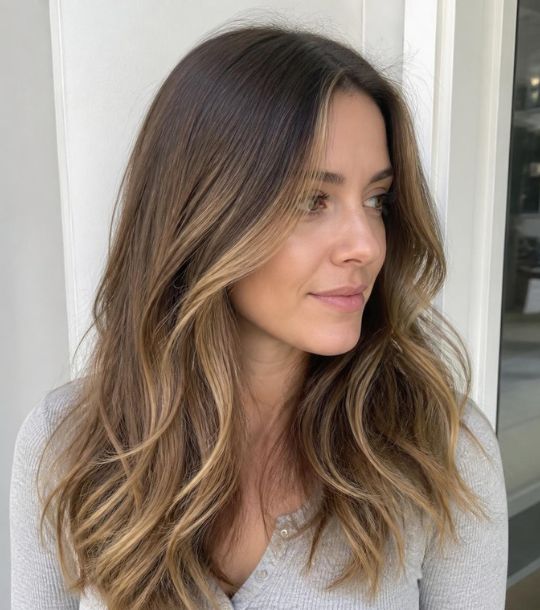
Bronde is the perfect destination for anyone who wants the feeling of going blonde without the commitment of actually being blonde. The result sits exactly between brunette and blonde, with warm golden pieces woven through a brown base so naturally that it’s genuinely hard to tell where the base ends and the balayage begins.
Ask for fine, feathered pieces rather than bold sections. The whole point of bronde is seamlessness, and chunky highlight sections immediately break that illusion. A demi-permanent golden gloss applied over the finished balayage unifies the tones and adds the kind of shine that makes bronde look genuinely expensive.
6. Light Brown to Platinum Blonde
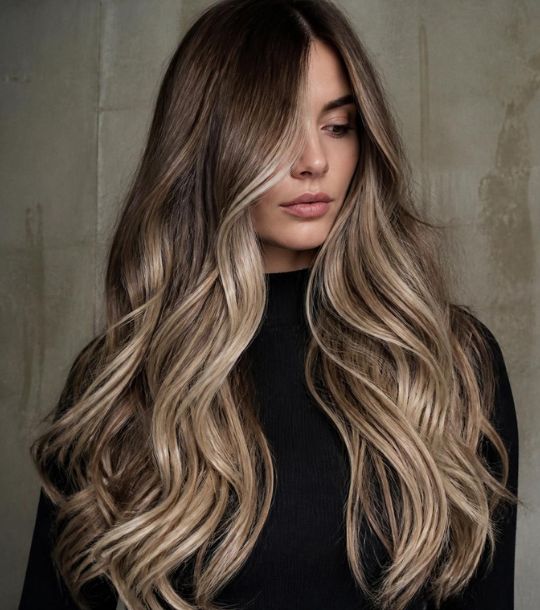
Taking light brown hair all the way to platinum blonde balayage is a dramatic, high-contrast transformation that requires serious planning and almost certainly multiple sessions. The platinum pieces need to be lifted to a very pale yellow before toning, which takes time and careful technique to achieve without compromising the condition of the hair.
Budget for two to three sessions spaced four to six weeks apart and use a bond-protecting treatment like Olaplex at every appointment. Between sessions, a purple toning shampoo used once or twice a week keeps the platinum pieces from drifting warm while the rest of the hair recovers between lifts.
7. Sandy Blonde Balayage
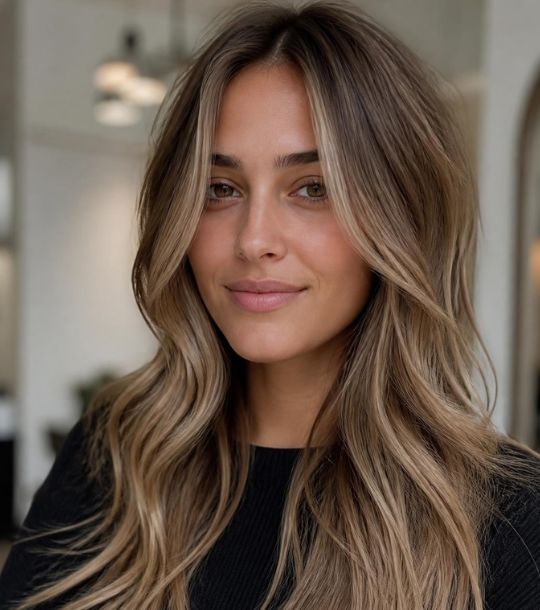
Sandy blonde is a muted, slightly beige-toned blonde that avoids the brassiness of warmer golds while staying softer and more natural than an ash blonde. On light to medium brown bases, it creates a beautifully understated result that looks completely natural in daylight and effortlessly polished in photos.
A beige or neutral toner at the end of the lightening process is what achieves the sandy quality rather than a golden or ash toner. Ask your colorist specifically for a neutral to slightly cool beige tone at the final step. Sandy blonde is entirely about the toner choice rather than the lightening itself.
8. Copper Blonde Balayage
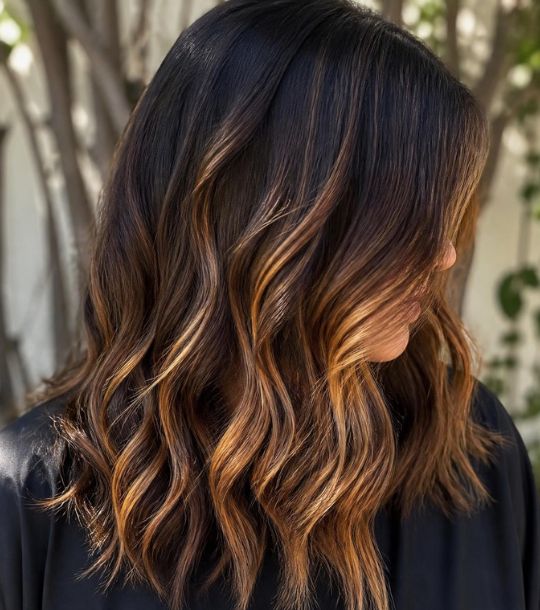
Copper blonde sits in that warm, fiery space between traditional brown to blonde and a red or auburn look. It’s a bold, warm choice that photographs exceptionally well and suits warm and olive skin tones beautifully. On a dark brown base, the copper pieces look rich and intentional rather than accidental, which is what separates a great copper balayage from a bad one.
Copper tones fade faster than most blonde shades, so plan for a toning gloss appointment every three to four weeks to maintain the vibrancy. Use a colour-safe sulfate-free shampoo for every wash and rinse with cool rather than hot water to slow the fade between appointments.
9. Medium Brown to Golden Blonde
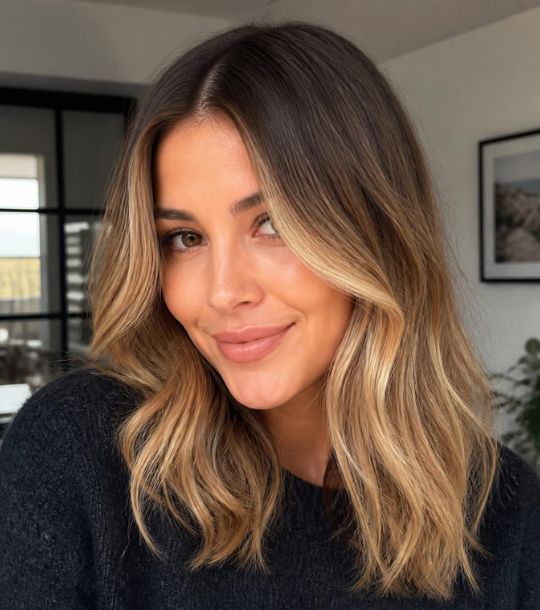
A medium brown base lifting to warm golden blonde is one of the most straightforward and reliably flattering brown to blonde balayage combinations. The natural undertones of medium brown hair tend to pull warm when lifted, which works directly in your favour when a golden blonde result is the goal. It’s one of the few colour journeys where your hair’s natural behaviour works with you.
This is often achievable in a single session on unprocessed medium brown hair, which makes it one of the most accessible options on the list. Ask for golden pieces concentrated most heavily through the face frame and ends while keeping the crown relatively close to the natural base for the most natural grow-out.
10. Dark Espresso to Warm Blonde
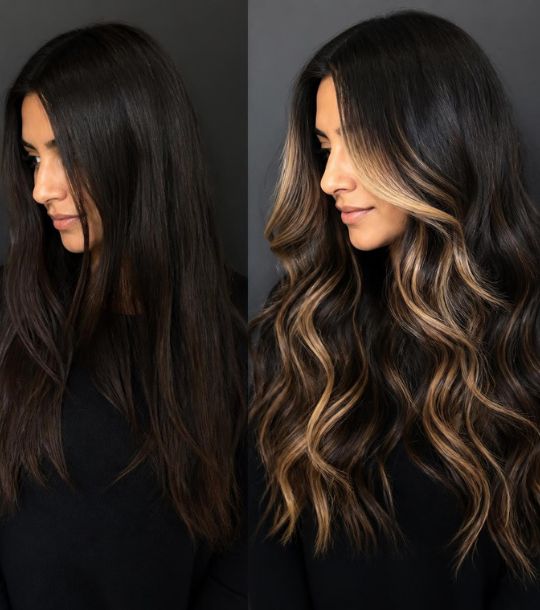
Starting from a very dark, near-black espresso base and working toward a warm blonde balayage creates a high-contrast, dramatic result that has serious visual impact. The dark base makes the warm blonde pieces look brighter and more luminous than the same blonde tone would on a lighter starting point. It’s a striking combination that suits bold personalities.
Expect this to be a multi-session process, typically three or more appointments depending on the depth of your natural or current colour. Each session lifts the pieces incrementally to avoid over-processing. A deep conditioning mask used weekly at home between sessions keeps the lightened pieces in the best possible condition through the journey.
11. Brown to Beige Blonde Balayage
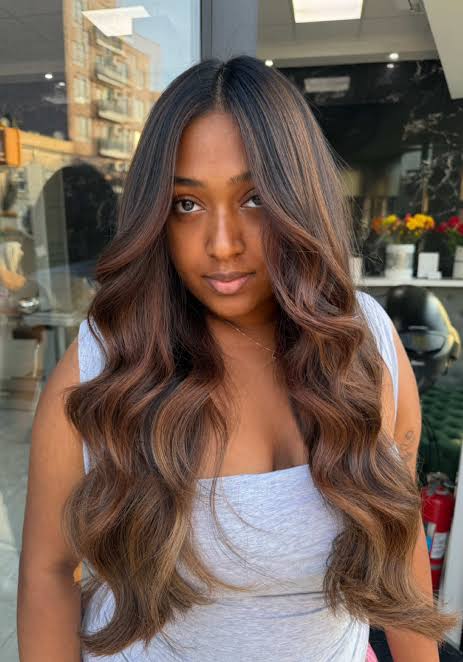
Beige blonde on a brown base is quiet, cool, and effortlessly chic. It avoids the warmth of golden blondes and the sharpness of ash blondes, sitting in a soft neutral space that reads as natural and understated. On medium brown hair with cool or neutral undertones, it looks genuinely like the hair has always been this colour.
A cool beige toner applied after lifting is the defining step of this look. Without the right toner, the lifted sections will pull warm or brassy rather than beige. Ask your colorist to use a toner with a slight violet base to neutralise any remaining warmth while still staying on the beige side of blonde rather than going fully ashy.
12. Balayage With Face-Framing Babylights
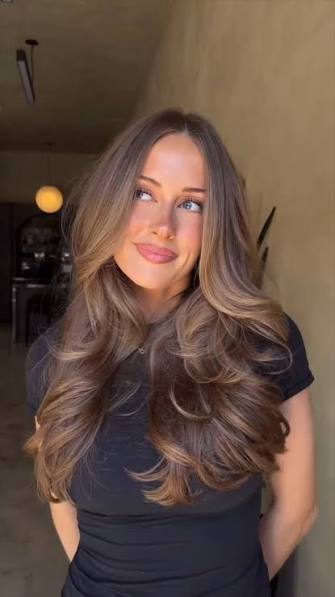
Adding fine babylights through the face-framing sections on top of a standard balayage creates a brightness and luminosity right where it counts most. The babylights sit close to the scalp through the hairline, which gives the colour a natural, almost sun-bleached quality that standard balayage sections alone can’t achieve. It’s the detail that separates a good balayage from a great one.
Ask for babylights through the top two or three sections on either side of the part in addition to your regular balayage. These fine lights add brightness at the root without a harsh highlight line. They also make the grow-out significantly more natural because the lightness starts close to the scalp rather than only through the mid-lengths and ends.
13. Tortoiseshell Balayage
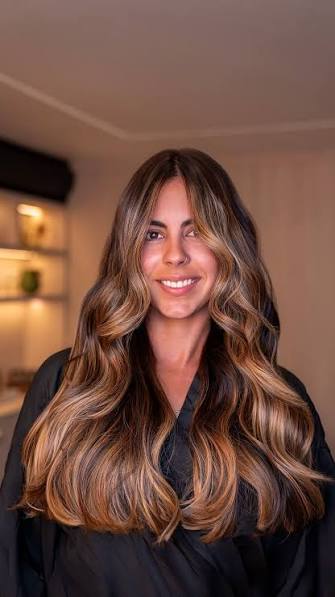
Tortoiseshell balayage blends warm browns, caramels, and blonde tones in a layered, organic pattern that mimics the look of tortoiseshell. It’s a rich, multidimensional colour that looks different in every lighting condition, which is one of the things that makes it so interesting and so enduringly popular. No two tortoiseshell balayage results look exactly alike.
This technique requires a colorist who is comfortable working with multiple tones simultaneously rather than a single lightener and toner combination. The layering of warm and slightly cooler pieces next to each other is what creates the tortoiseshell effect. A gloss in a warm amber tone applied at the end unifies the different pieces without flattening the variation.
14. Brown to Blonde Balayage On Curly Hair
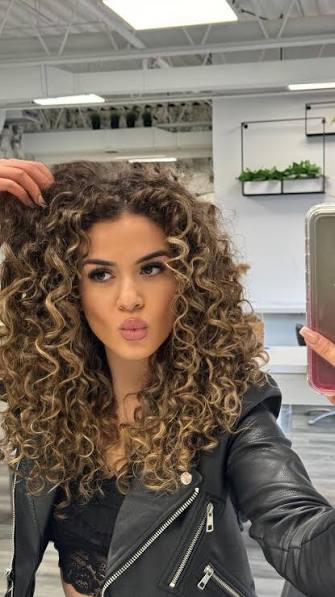
Curly hair and brown to blonde balayage are a spectacular pairing. The colour wraps around each curl differently, catching light from multiple angles and creating a dimensional, almost three-dimensional effect. On tight or loose curls alike, the balayage looks more complex and more expensive than the same colour on straight hair.
Ask your colorist to apply the balayage by curl section rather than by straight hair sections if your curls are defined and consistent. Painting along the natural curve of the curl rather than against it ensures the colour sits where it will show best when the hair is dry and curled. Use a curl-safe colour-protecting conditioner after every wash to maintain both the colour and the curl pattern.
15. Reverse Balayage Dark Ends
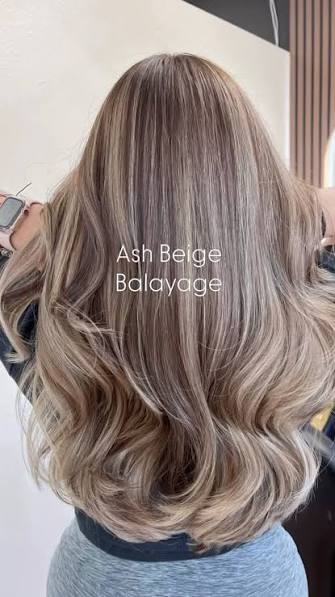
Reverse balayage flips the traditional formula, keeping the ends darker and allowing the lighter, blonder sections to live through the mid-lengths and closer to the root. It’s an unexpected take on brown to blonde that adds depth at the ends and brightness through the body of the hair. On shoulder-length or longer hair, it creates a genuinely unique silhouette.
This works best on hair that is at least collarbone length so the contrast between the dark ends and the lighter mid-lengths has enough distance to read clearly. Ask your colorist to keep the ends at your natural brunette depth and concentrate the balayage pieces through the middle and upper sections for a clean reversal of the traditional gradient.
16. Brown to Blonde Ombre Balayage
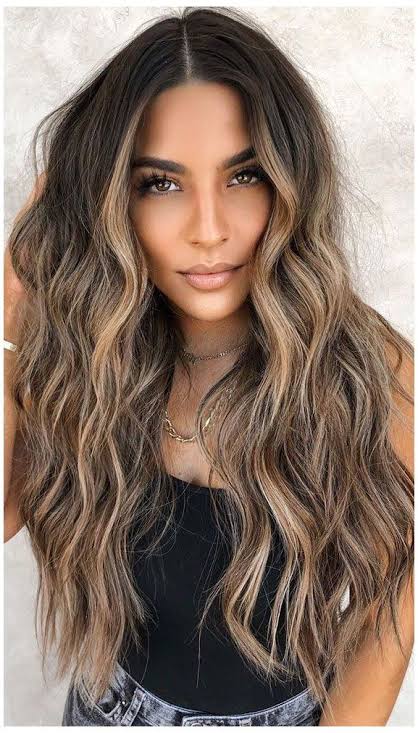
A brown to blonde ombre balayage takes the gradual light-to-dark transition of ombre and softens it with balayage technique, so the shift is less of a hard line and more of a graduated, organic blend. The result is more natural than a traditional ombre and more dramatic than a standard balayage, sitting comfortably between the two approaches.
The transition point is the most important decision in this look. Ask your colorist to start the lightening around the collarbone or slightly above for the most flattering gradient. Starting too high makes it look like a bad grow-out rather than an intentional ombre. Starting too low doesn’t give the gradient enough length to develop properly.
17. Chunky Blonde Highlights On Brown
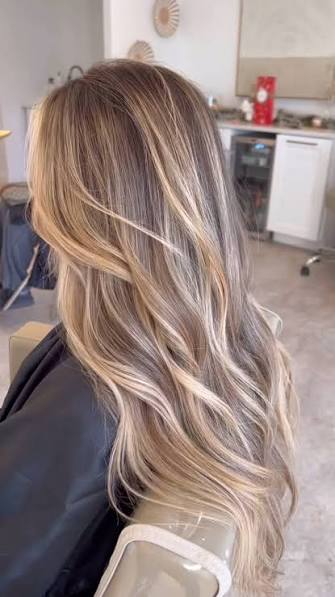
Chunky, visible blonde highlights on a brown base are having a revival and for good reason. The bold sections of blonde against a rich brown base have a retro-cool energy that fine, seamless balayage doesn’t capture. It’s a deliberate, confident colour choice that looks best when worn with the same intentionality it’s applied with.
Ask for sections that are clearly visible but not excessively wide, around one to two centimetres each. Too narrow and you lose the chunky quality. Too wide and it starts looking patchy rather than bold. A toner in a warm golden or buttery blonde keeps the chunks from looking harsh against the brown base.
18. Brown to Blonde With Lowlights
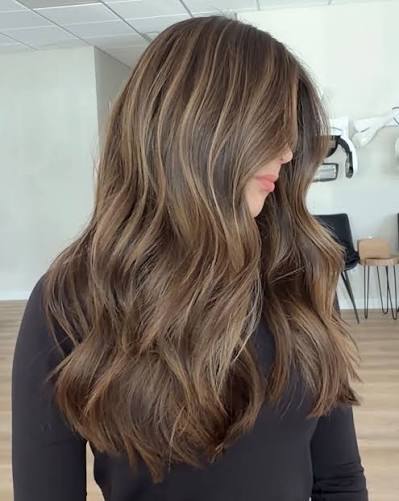
Adding a few strategic brunette lowlights back into an existing brown-to-blonde balayage is what keeps the colour from looking flat or one-dimensional over time. The darker pieces reintroduce depth and shadow, making the blonde pieces look brighter by contrast and the overall colour look more layered and intentional. It’s the technique that keeps a balayage looking fresh at the six-month mark.
Keep the lowlights only one to two shades deeper than your natural base rather than going dramatically dark. The goal is subtle shadow and contrast rather than a bold two-tone result. A demi-permanent colour rather than permanent works well for lowlights since it fades gradually rather than leaving a hard line of regrowth.
19. Sun-Kissed Summer Balayage
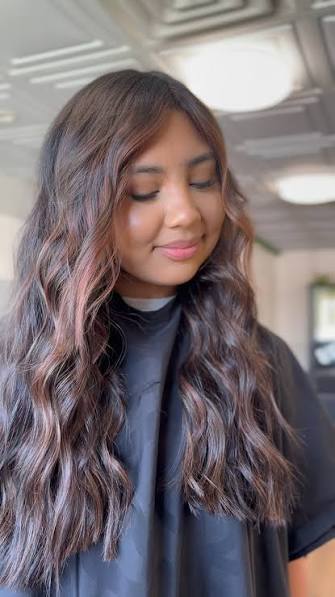
Sun-kissed balayage is specifically designed to look like the hair lightened naturally over a long summer rather than in a salon. The pieces are scattered organically through the mid-lengths and ends with no visible pattern or placement structure. The randomness is the entire point, and achieving it well requires a colorist who is genuinely skilled at freehand application.
Ask for pieces that are varied in width and placement rather than consistently spaced. Natural sun lighting is irregular and inconsistent, and the balayage needs to mimic that quality to be convincing. A light golden toner rather than anything too precise or cool keeps the final result looking like something that happened naturally.
20. Balayage With Tonal Gloss Finish
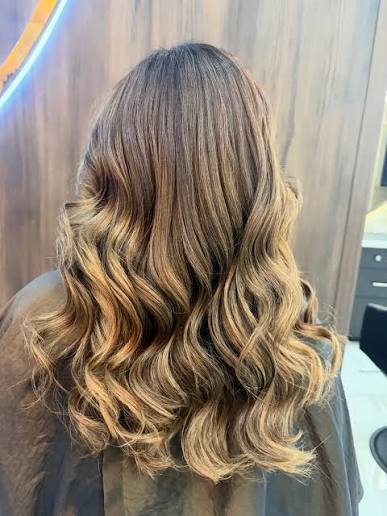
A tonal gloss applied over a completed brown-to-blonde balayage is what separates a good result from an extraordinary one. The gloss unifies the different tones, adds a mirror-like shine, and slightly deepens or warms the overall colour in a way that makes the balayage look more seamless and expensive. It’s a step many colorists skip, and many clients don’t know to ask for.
Request a gloss in a tone that sits between your brunette base and your blonde pieces, something in the golden or caramel family for warm balayage results or a cool beige for ashier ones. The in-between tone is what creates cohesion without flattening the contrast that makes balayage worth doing in the first place.
21. Balayage Money Piece On Brown Hair
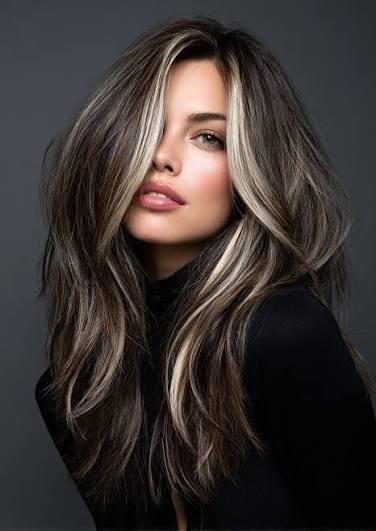
A bold, bright money piece, two sections of noticeably lighter blonde framing the face against a brown base, is the fastest and most targeted way to get the brown-to-blonde balayage effect without committing to a full head of colour. The contrast right at the face brightens the complexion immediately, and the rest of the hair stays completely untouched.
Placement is the entire technique here. Ask for the money piece to start right at the hairline and stay within the first inch on either side of the face. Wider than that and it becomes a face frame rather than a money piece. A bright, warm blonde tone on the money piece against a dark brown base creates the most immediate and striking contrast.
22. Brown to Blonde Balayage For Short Hair
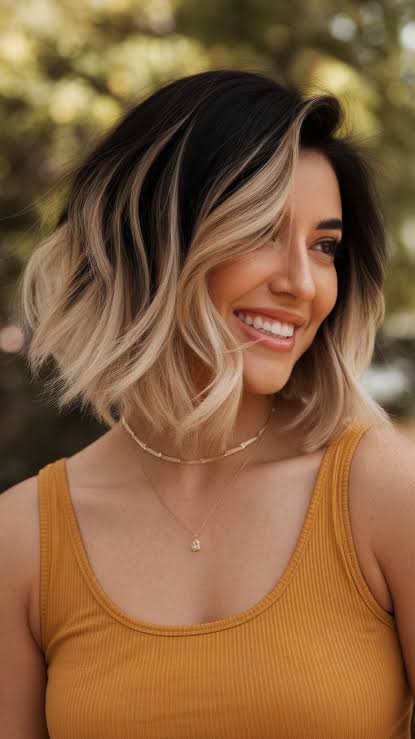
Balayage on short hair is underused and genuinely stunning. On a bob or lob, brown to blonde balayage sits closer to the face and creates an immediate brightening effect that longer styles distribute over more length. The colour has less distance to travel, which means the contrast is more concentrated and more visible in the final result.
Ask your colorist to focus the lightest sections at the ends and around the face frame since those are the highest movement and highest visibility zones on shorter cuts. On very short hair, even a small amount of well-placed balayage creates a dramatically different look from single-process colour. Less really is more at shorter lengths.
FAQs
How many sessions does brown to blonde balayage take?
It genuinely depends on your starting point. Light to medium brown hair with no previous colour can often reach a warm golden blonde in one session. Dark brown or previously coloured hair typically needs two to three sessions spaced several weeks apart. Trying to rush the process in a single appointment on dark hair almost always results in uneven, damaged colour.
How do I stop brown to blonde balayage from going brassy?
Use a purple toning shampoo once a week and a toning conditioner in between. Apply a UV protectant spray before any sun exposure since UV rays are one of the primary causes of blonde pieces oxidising warm. Heat styling without a protectant also accelerates brassiness significantly.
How long does brown to blonde balayage last?
The balayage itself, meaning the lightened sections, is permanent in the sense that those pieces won’t revert to brunette. What fades is the tone applied over the top. Most tones last four to eight weeks before they need refreshing with a gloss or toner appointment. The grow-out of the roots is what determines when you need a full colour appointment again, usually every ten to fourteen weeks.
Can I go from brown to blonde balayage at home?
Technically possible but genuinely not recommended. Freehand balayage application requires skill and experience to place correctly, and home lightening kits don’t give you the control a professional product does over the lift level. The risk of uneven lifting, breakage, or an unflattering result is significant. This is one colour service where the professional investment is consistently worth it.
Wrapping Up
Brown to blonde balayage has so much range within it that there’s genuinely a version for every starting point, every skin tone, every maintenance budget, and every personality. The styles on this list go from barely-there bronde to high-contrast platinum, and everything between those two points.
Save the ones that feel most like you, be honest with your stylist about where your hair is starting from, and trust the process if it takes more than one session. The results you see on this list are almost always the product of patience as much as technique.